This article is for professors, instructors, and course designers.
This article assumes the MyEducator CanvasConnect external tool has been globally integrated by your Canvas administrator.
Each step has associated text and screenshots. Be sure to read all text and view each screenshot for optimal results.
For assistance, contact integrations@myeducator.com or support@myeducator.com.
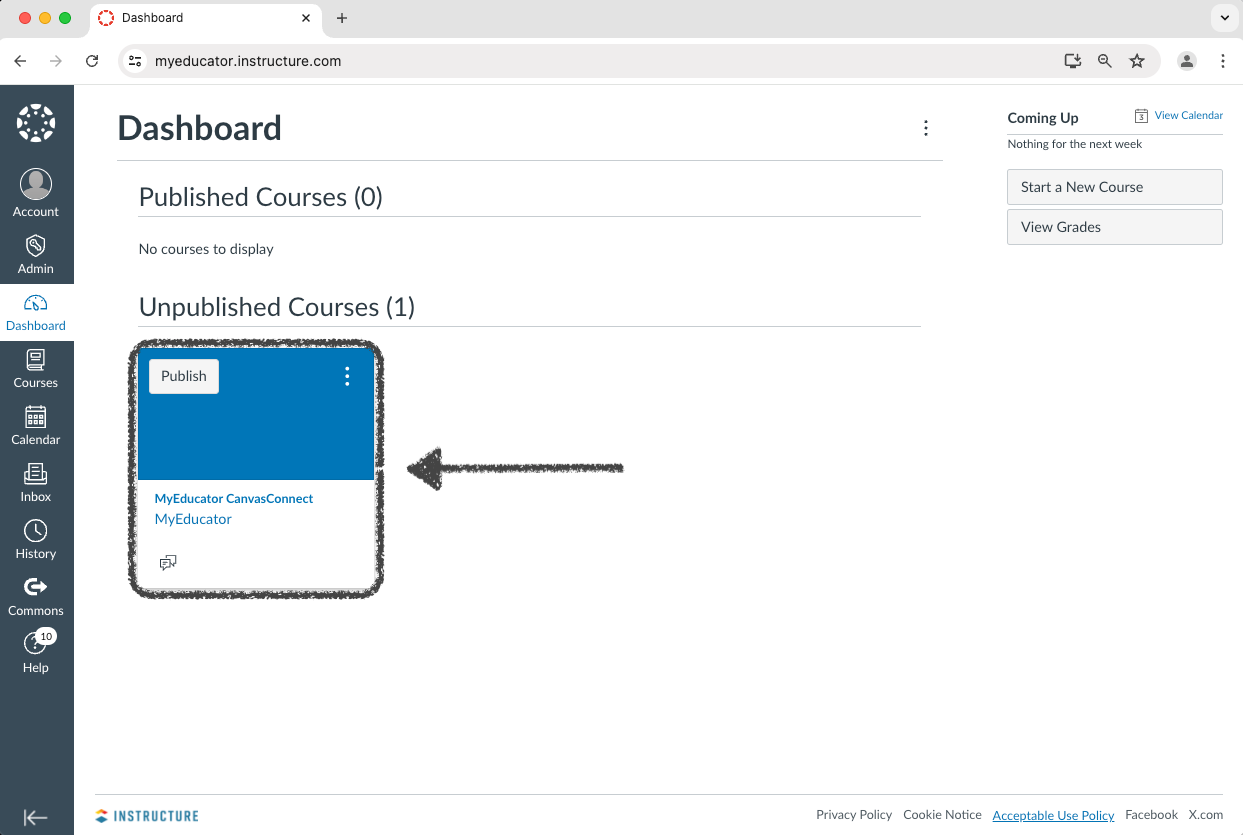
1) Log in to your Canvas account. Locate and click on your course.
2) Create, name, and add a new module. The name can be arbitrary.
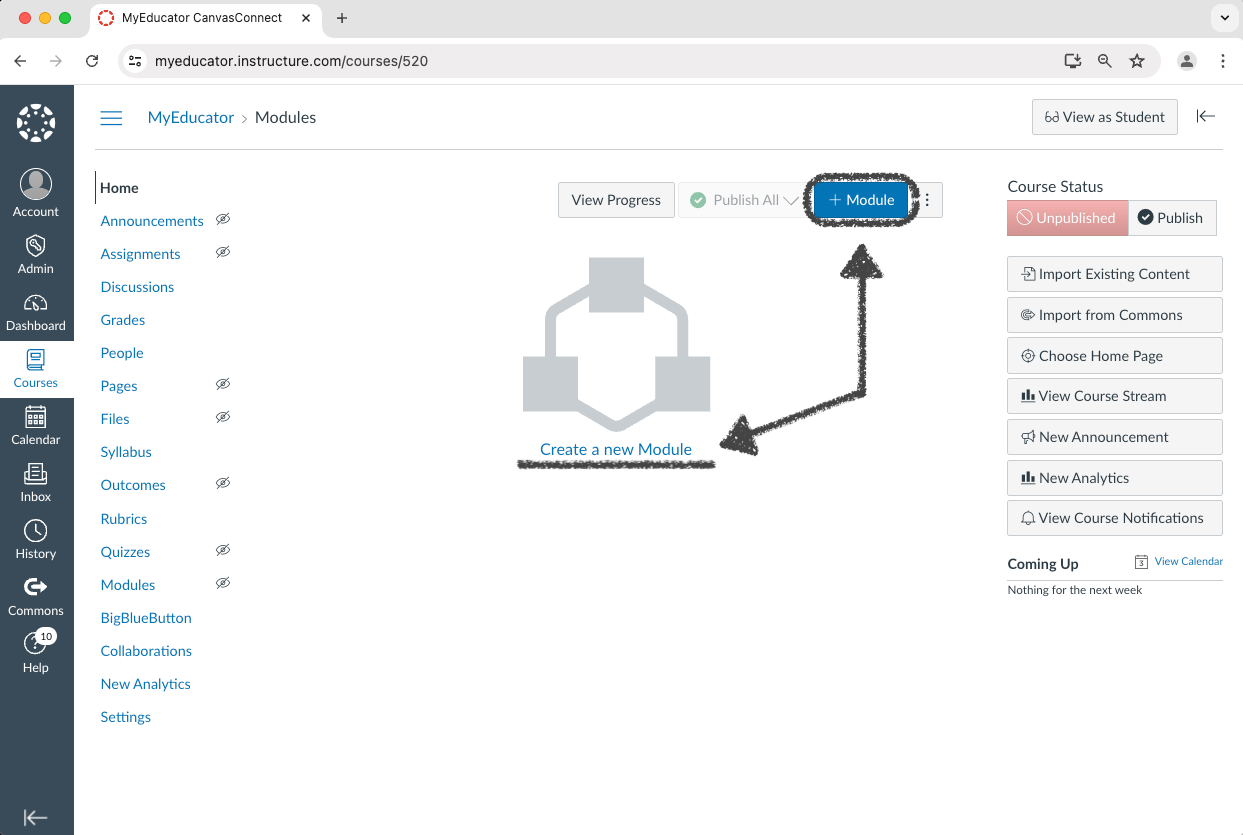

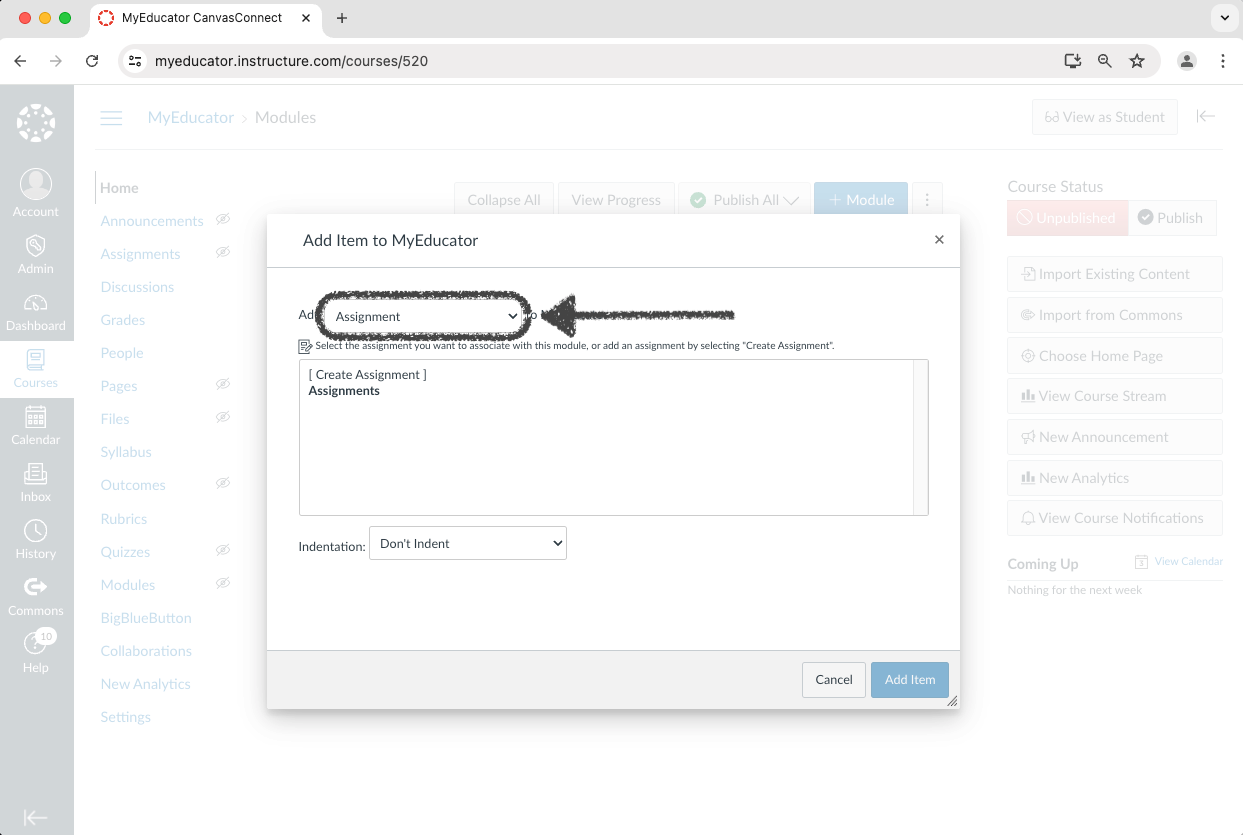
3) Click the new module’s “plus” icon.
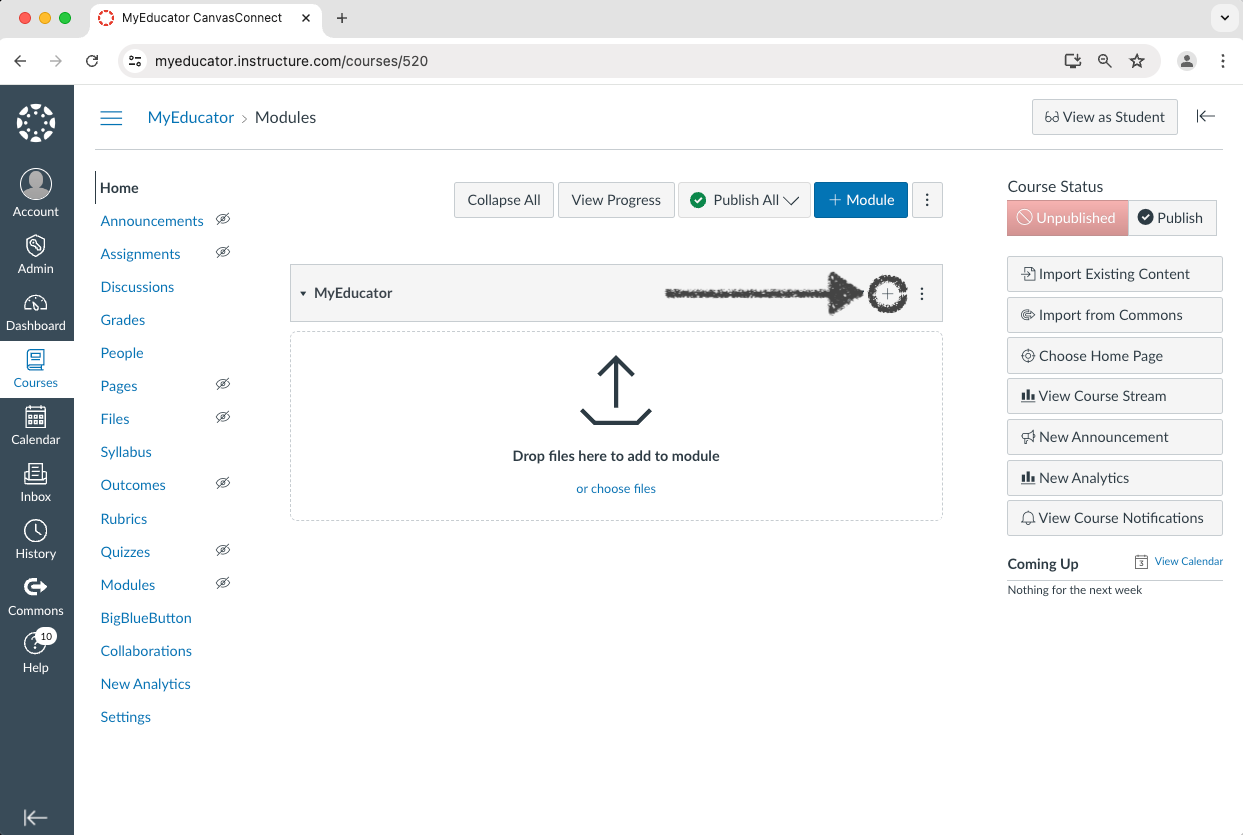
4) Change the top dropdown menu from “Assignment” to “External Tool.”
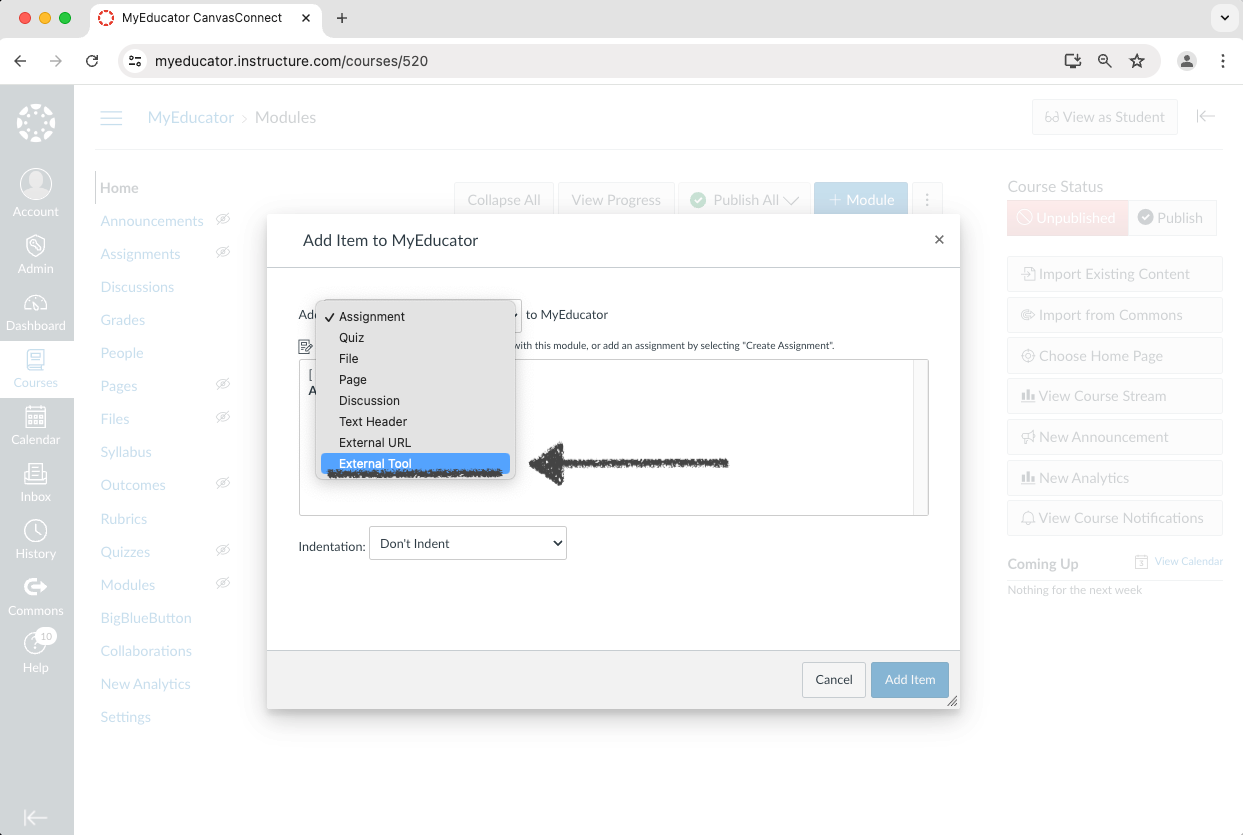
5A) Search for and select “MyEducator CanvasConnect” from the external tool options.
If the “MyEducator CanvasConnect” external tool does not appear as an option, verify it has been globally integrated by your Canvas Admin, or contact your MyEducator representative.
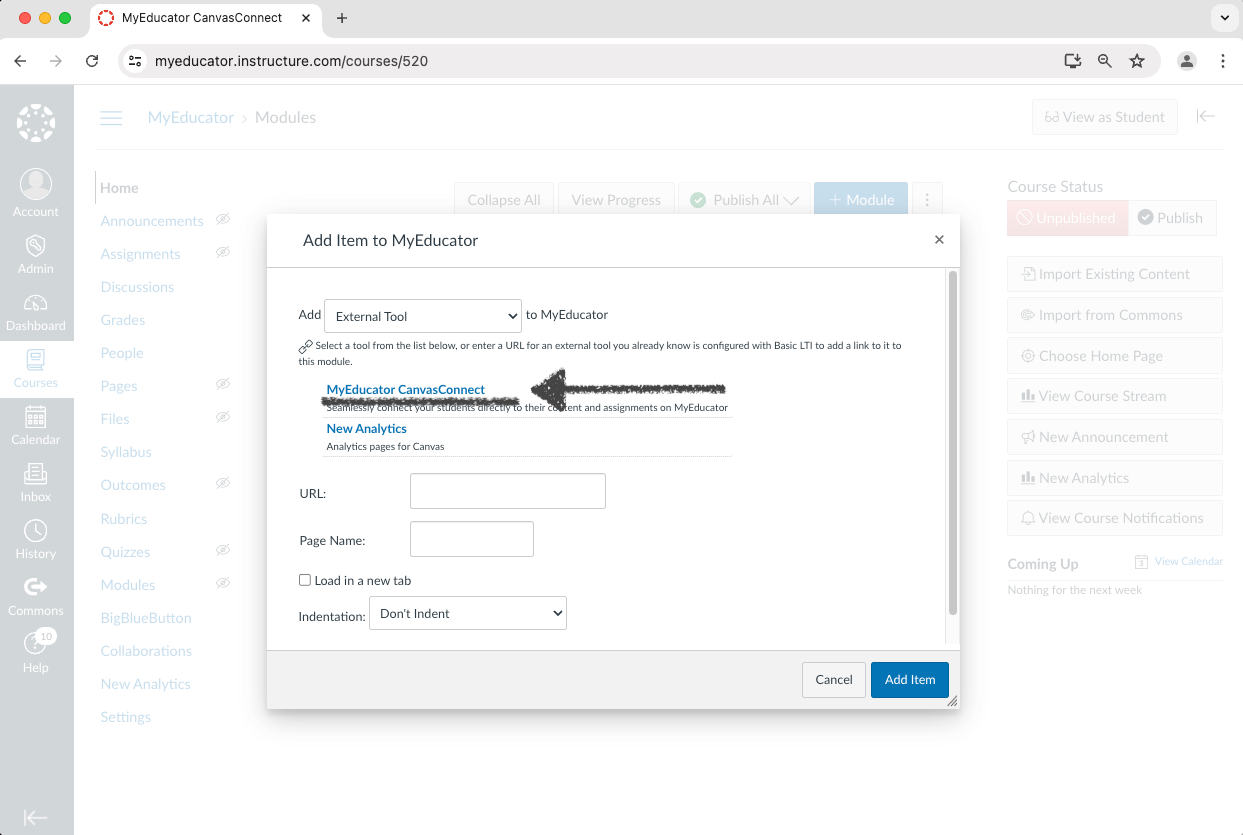
Note: This pop-up window, set to “External Tool,” typically contains two scroll bars: an inner and an outer scroll bar.
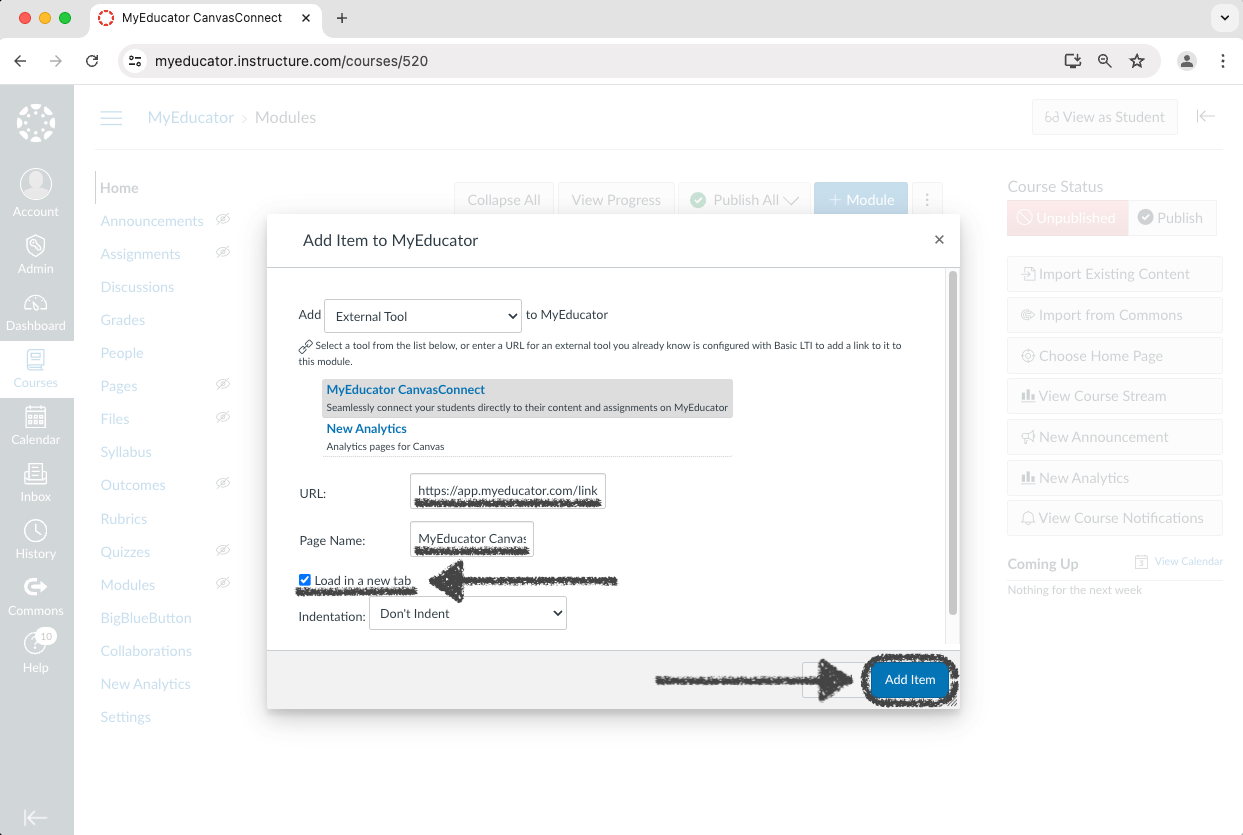
5B) The “URL” and “Page Name” text bars will auto-populate. Select the “Load in a new tab” option. Click “Add Item.”
6) Click the “MyEducator CanvasConnect” link. Click the “Load MyEducator CanvasConnect in a new window” button.

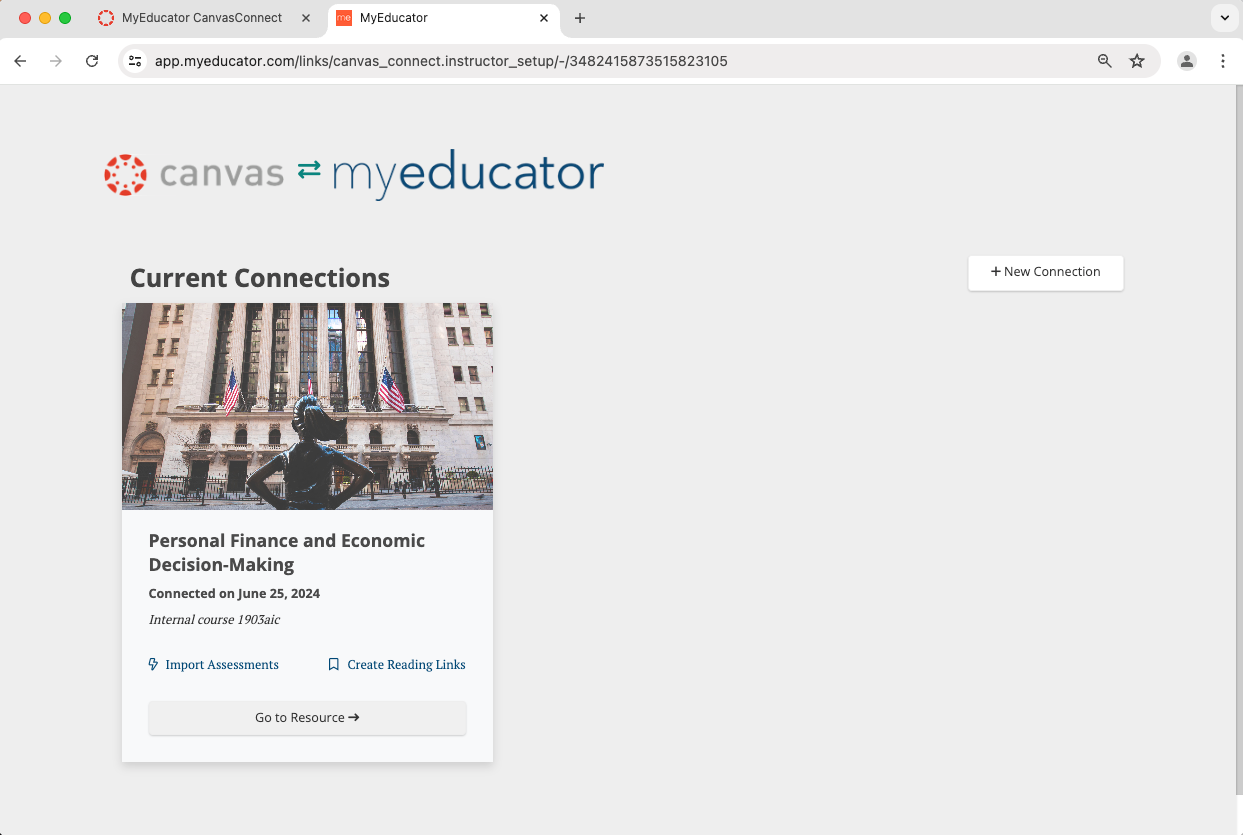
7) Select an available MyEducator resource from the dropdown menu.
Click "Create Connection." This may take a few minutes.
Please note that the resource you choose will be copied, and then that copy will be connected to your course.


Note: If the “Select an available resource” dropdown menu does not appear, contact your MyEducator representative for assistance.
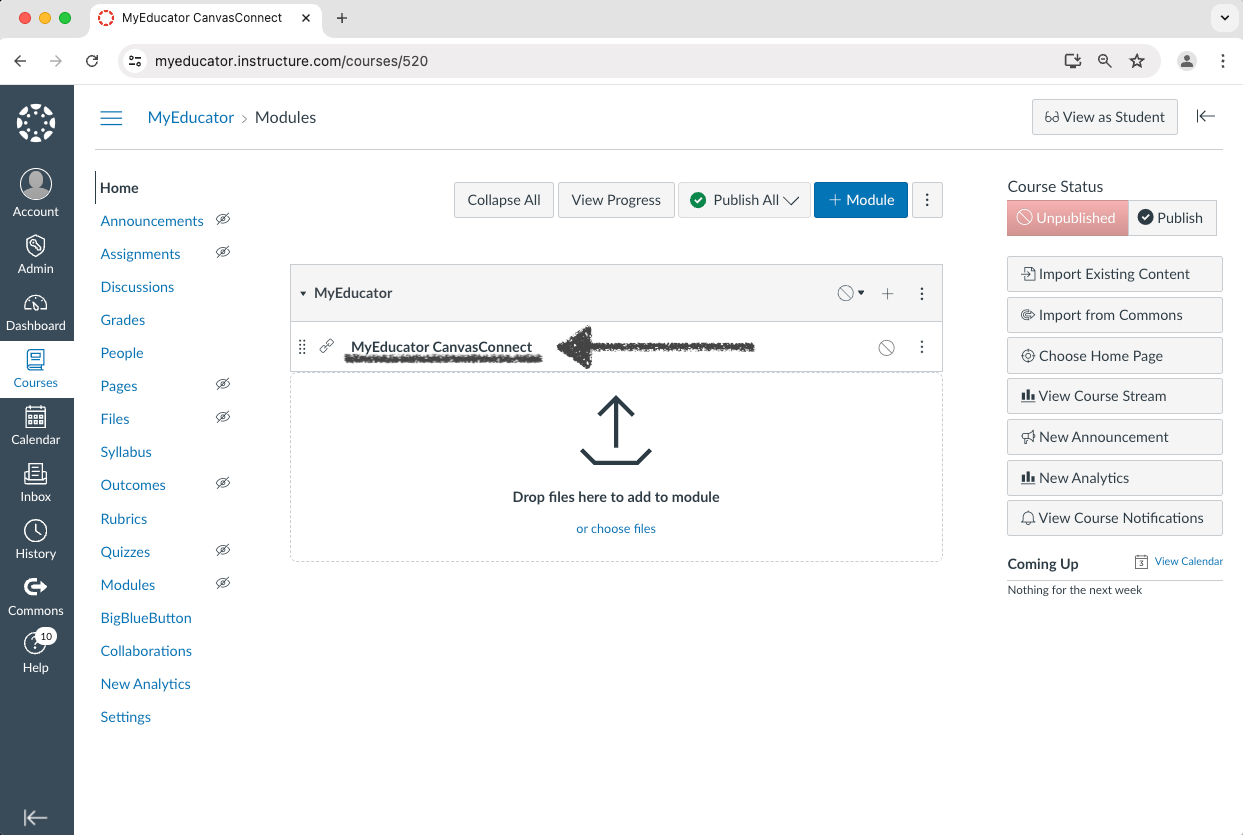
8) If you see a version of the screenshot below, showing your MyEducator resource, you have successfully connected your MyEducator resource to your Canvas course.
Continue with this article to import assessments and create reading links in your Canvas course.
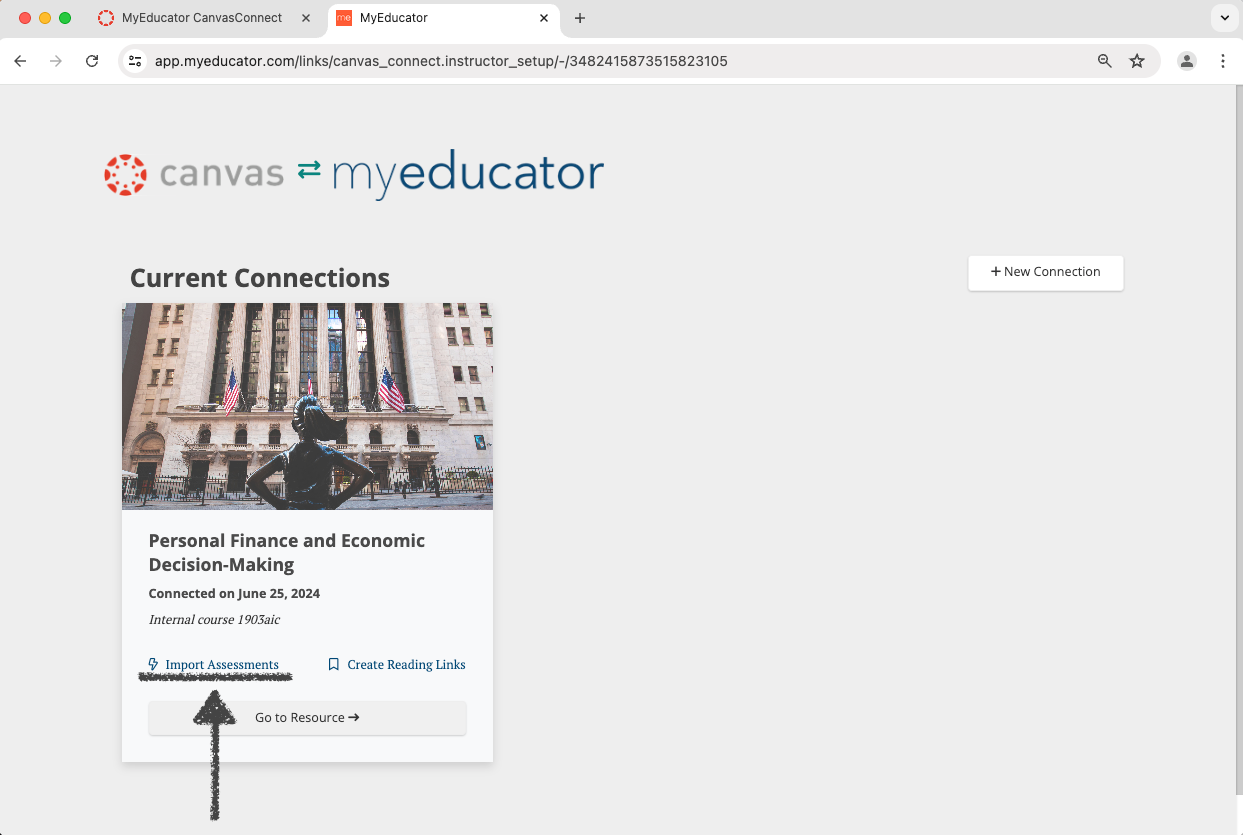
9) Click “Import Assessments.”
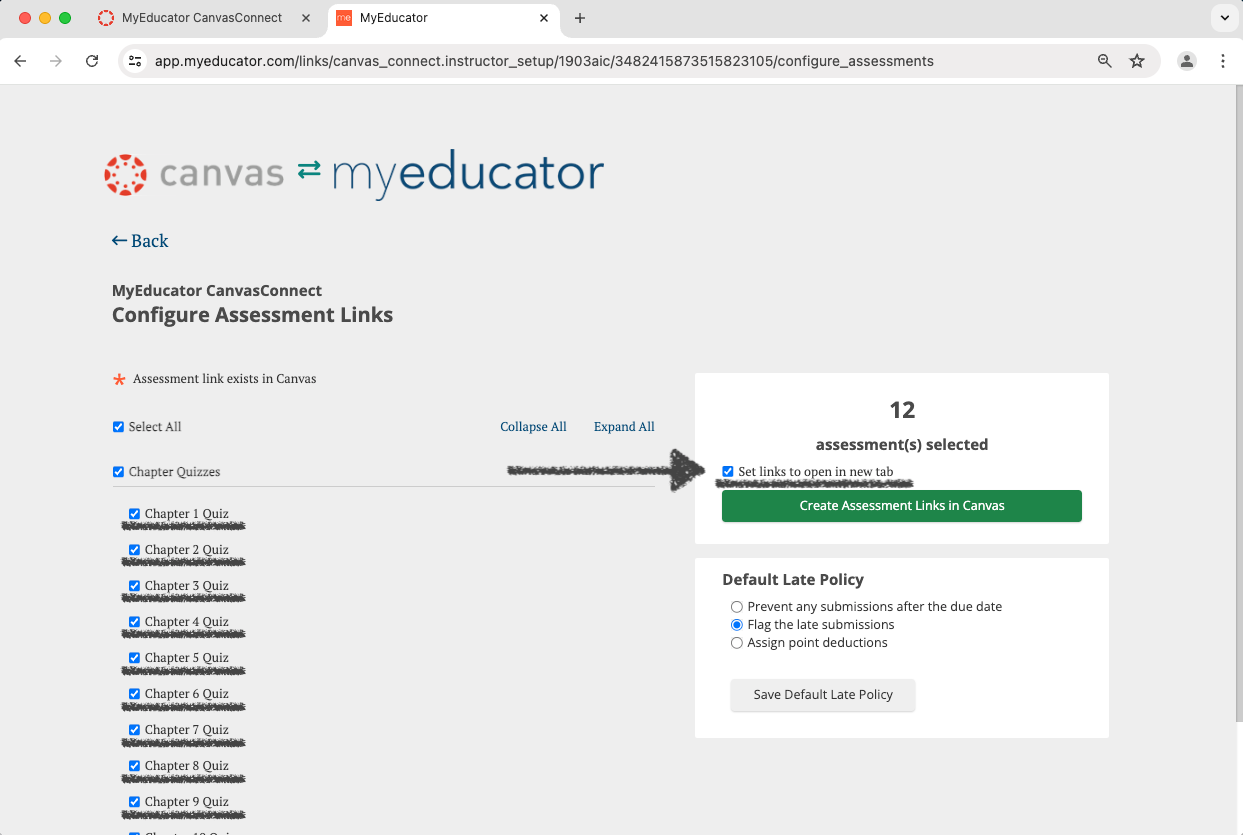
10) Select the assessments that you would like as graded assessments in your Canvas course.
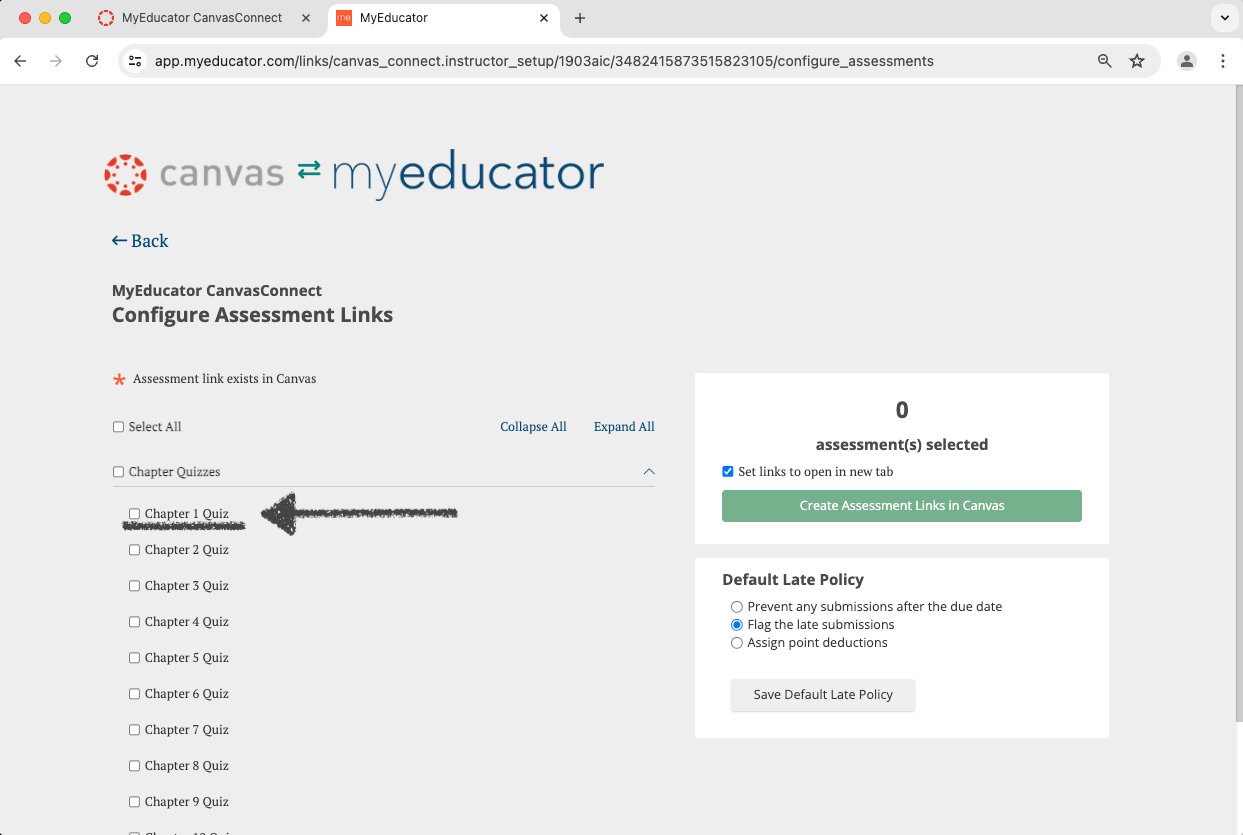
11) Decide whether or not to have the assessments open in a new tab in Canvas (recommended).
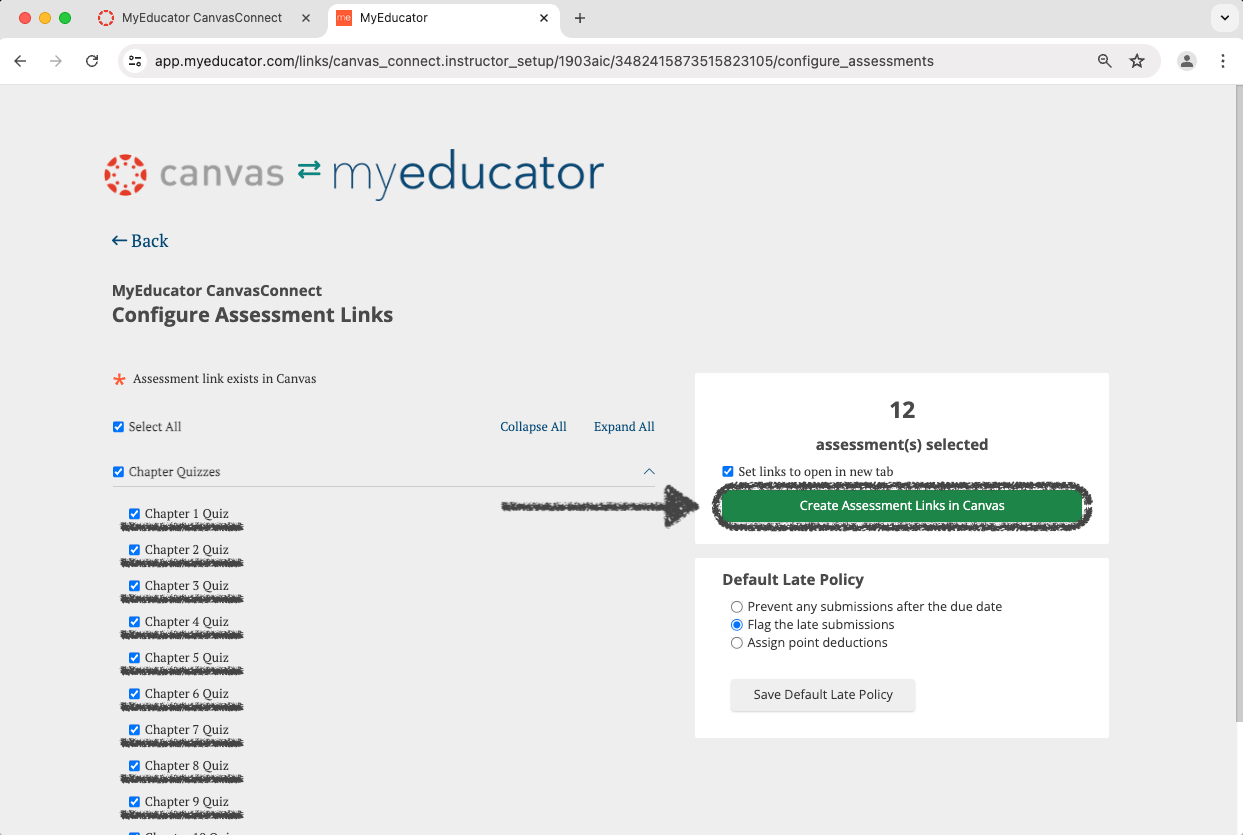
12) Click the ”Create Assessment Links in Canvas” button. Wait for the assessment creation to complete.
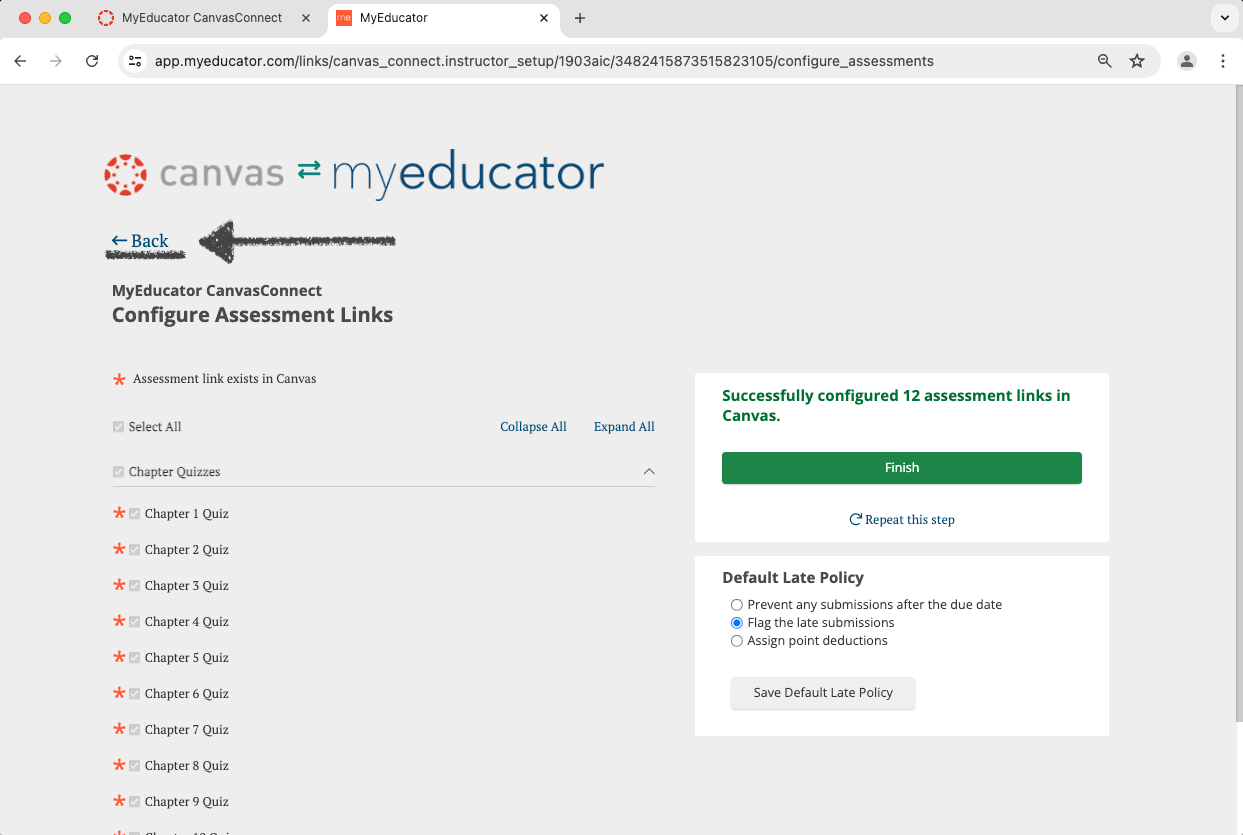
13) Click the “Back” option.
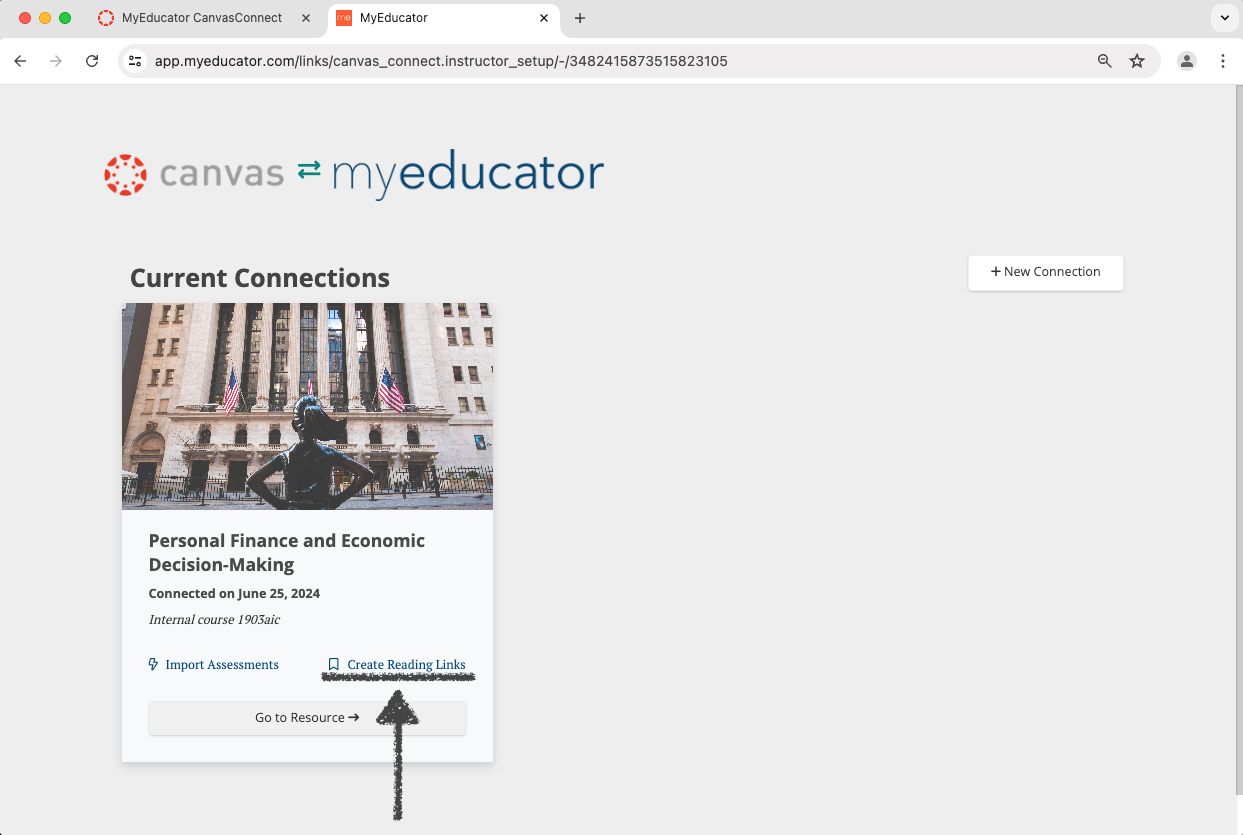
14) Click “Create Reading Links.”
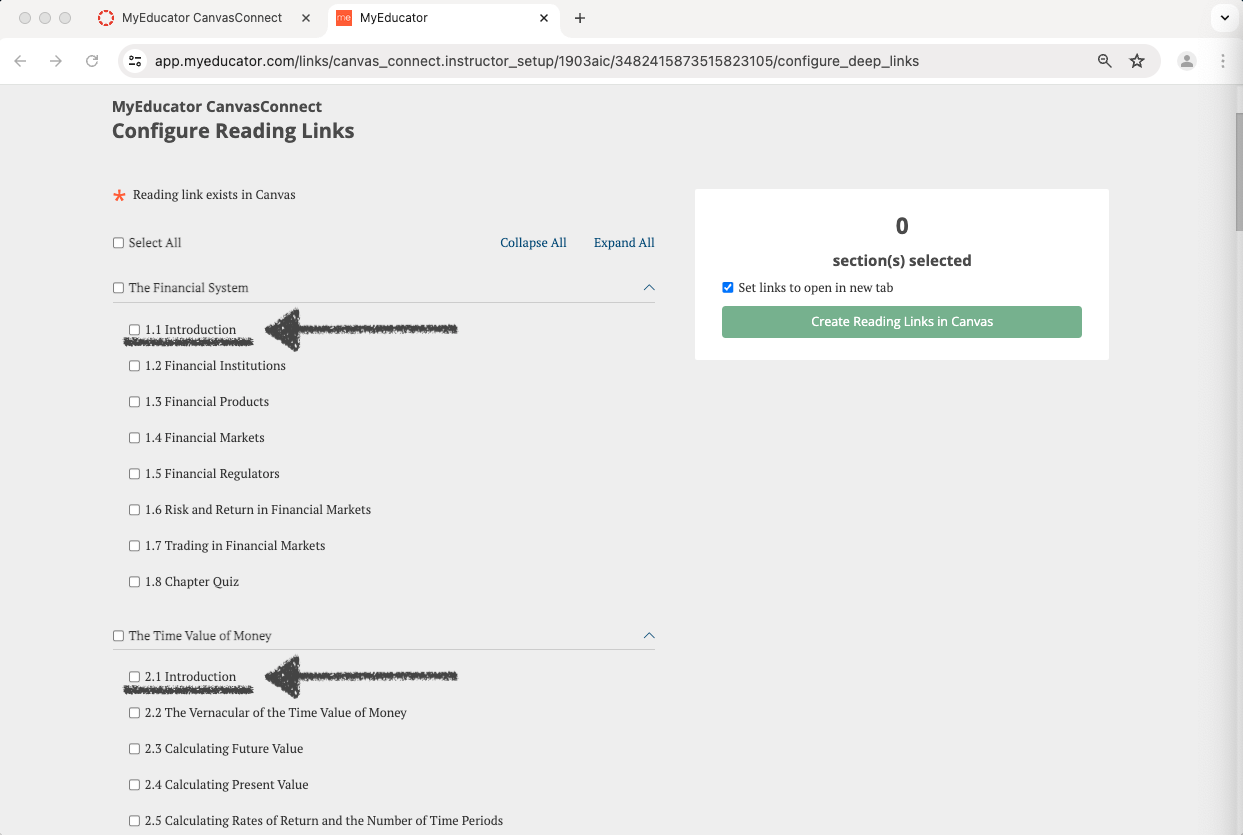
15) Select the reading links you would like to have appear in your Canvas course. Then scroll back to the top of the page.
Best practice is to only select the first reading link from each chapter, but you are free to add as many reading links as desired.
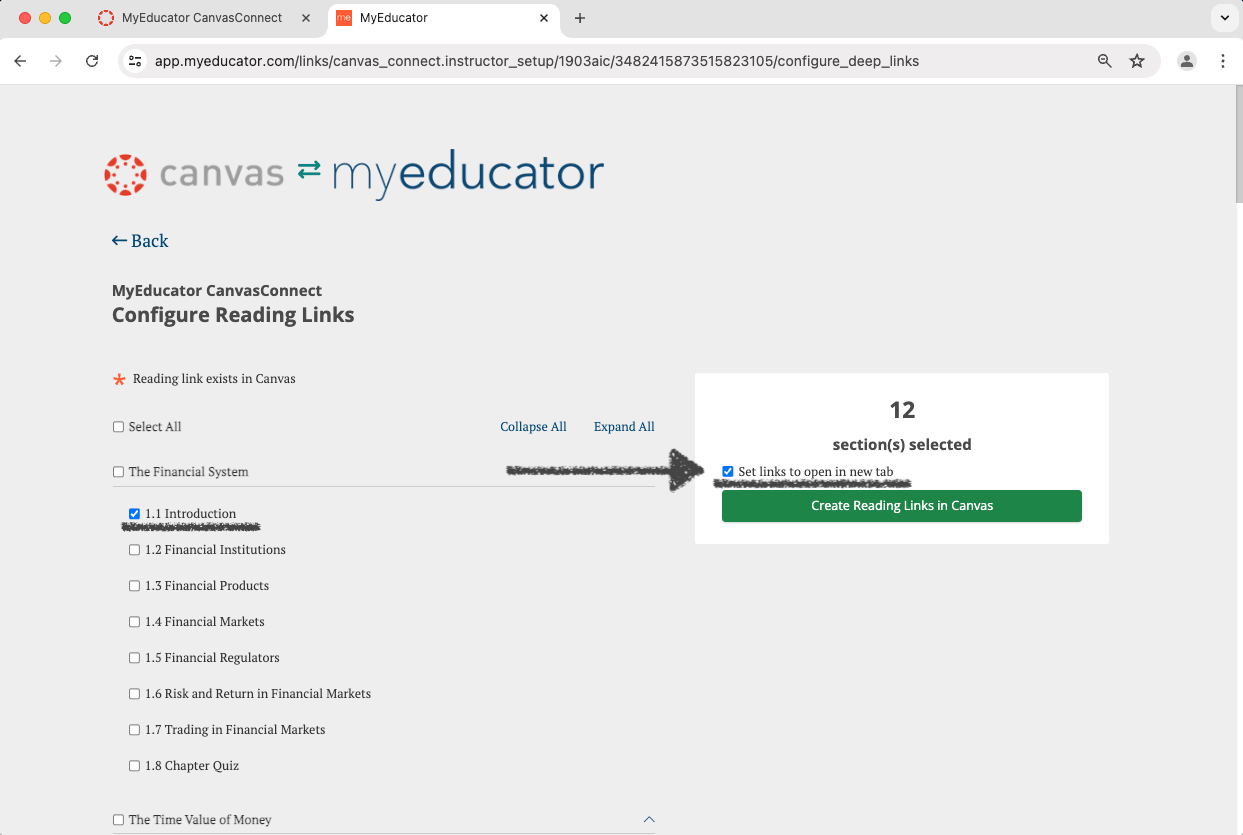
16) Decide whether or not to have the reading links open in a new tab in Canvas.
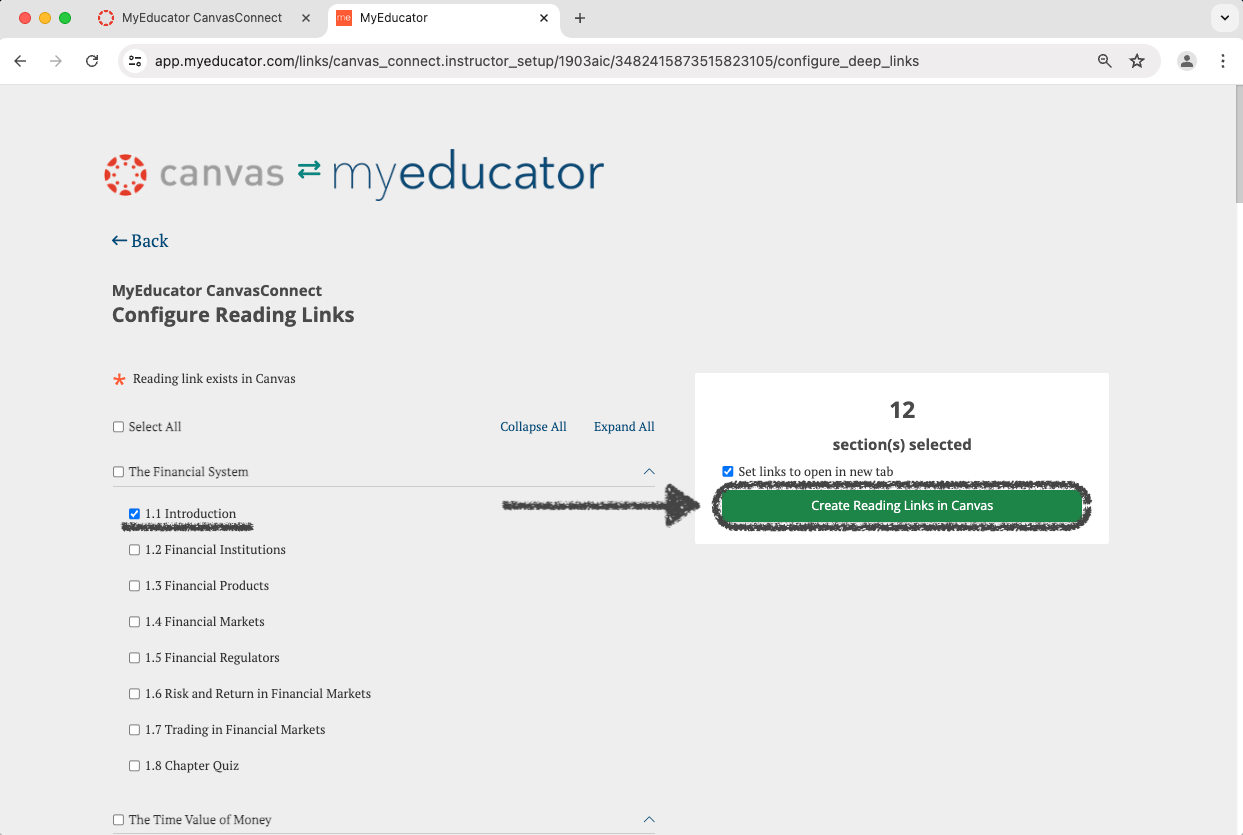
17) Click the ”Create Reading Links in Canvas” button. Wait for the completion of the reading link creation.
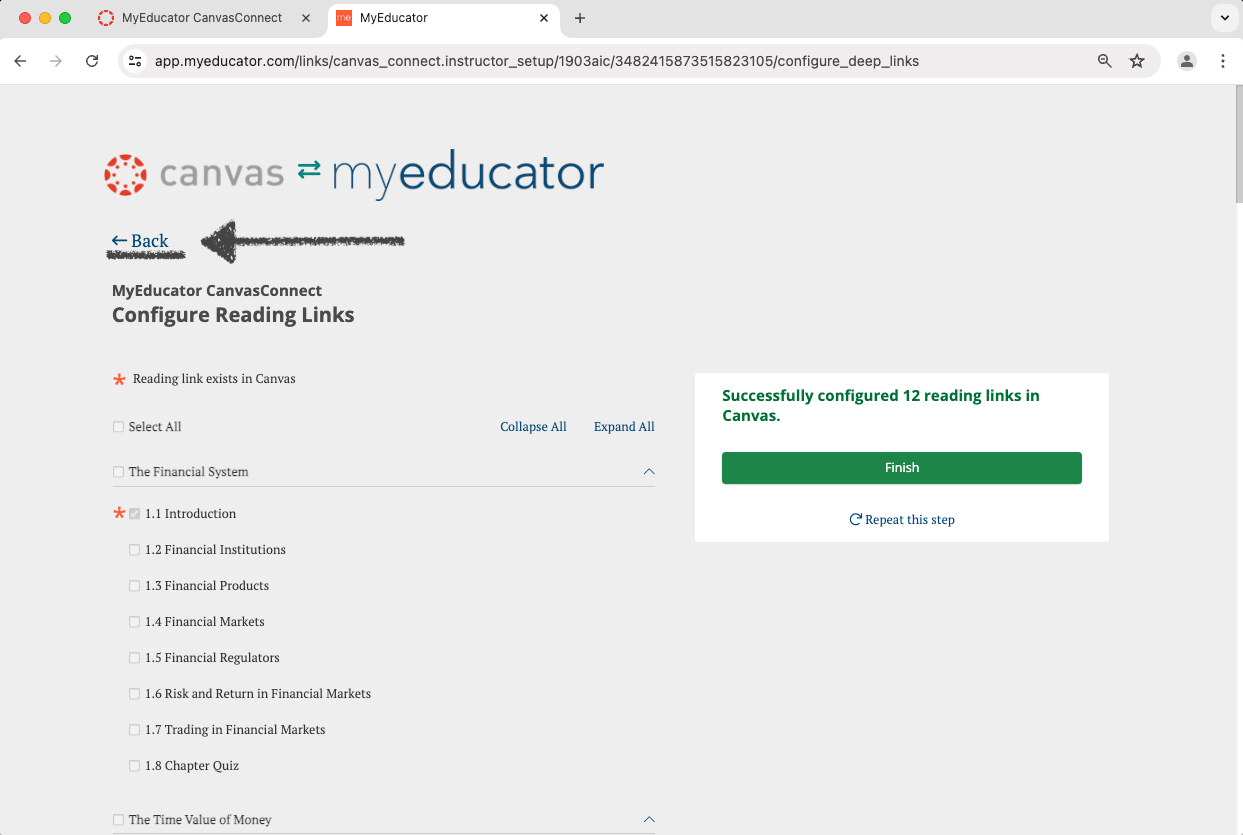
18) Click the “Back” option.
19) Click “Go to Resource.” Accept the MyEducator Terms of Service if prompted.
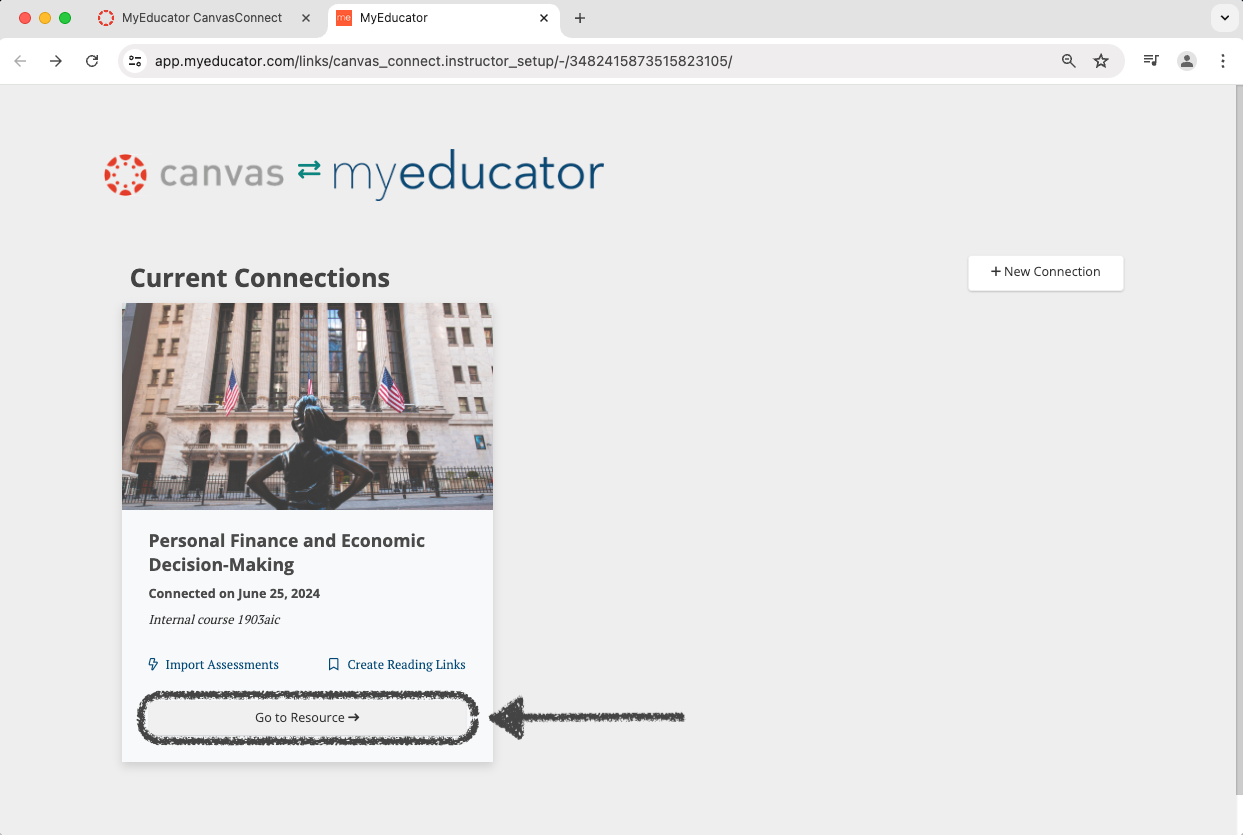
20) Verify that the expected resource appears. Exit this tab to return to the Canvas tab.

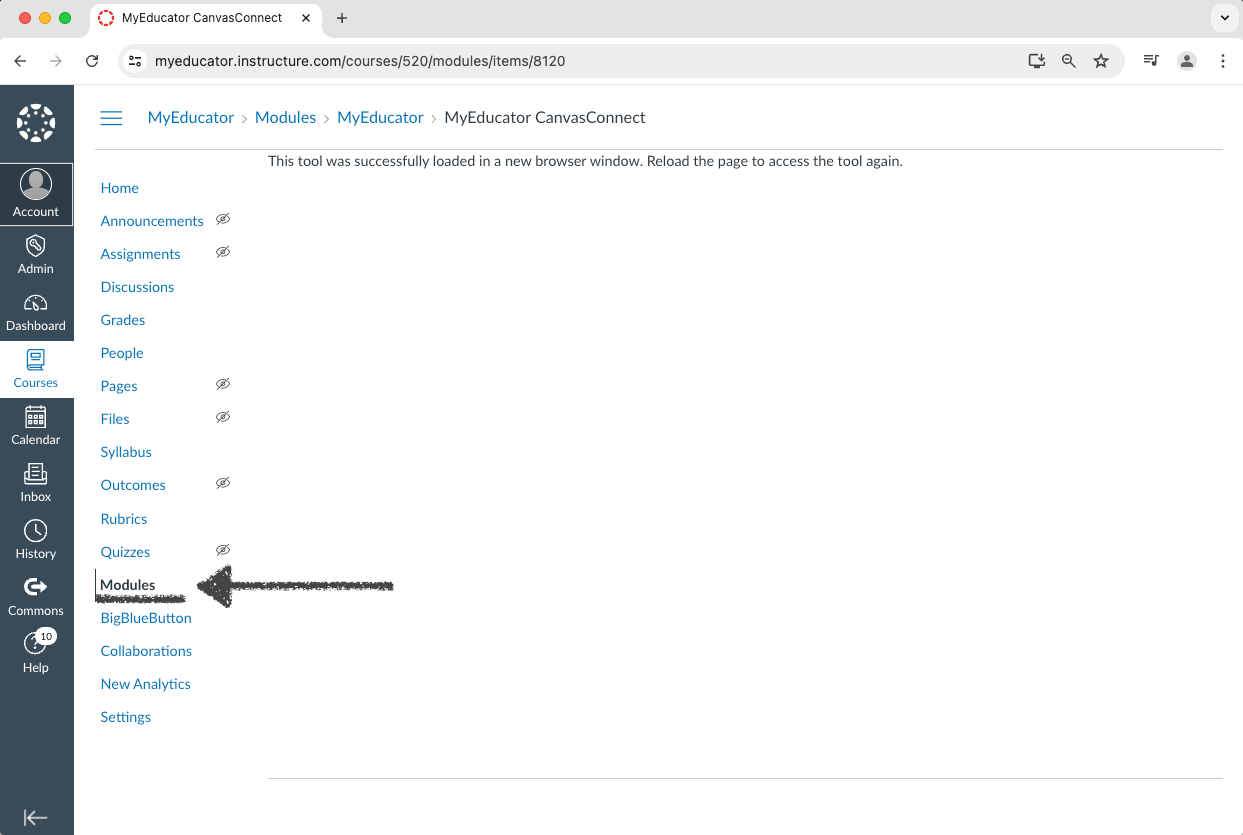
21) Click the ”Modules” navigation link.
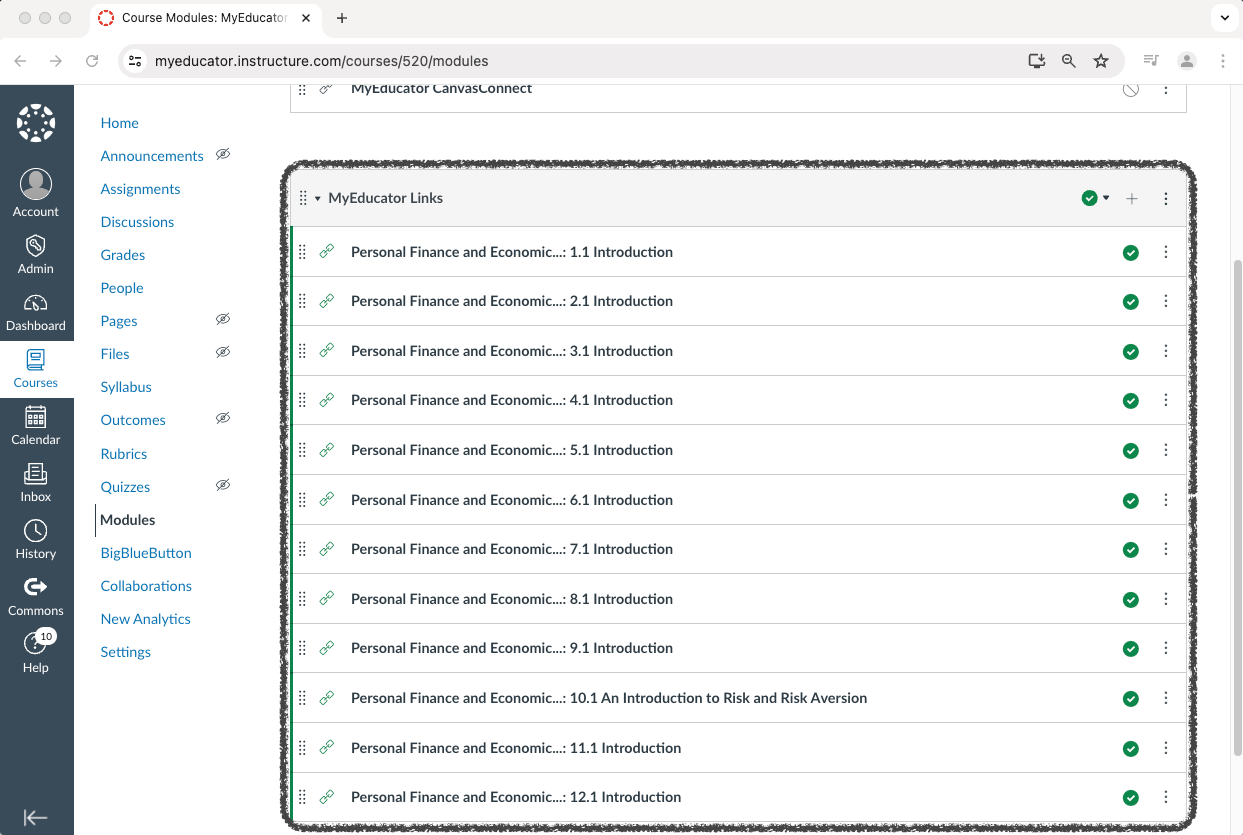
22) Scroll through this page to verify that all of the reading links have been added as expected.
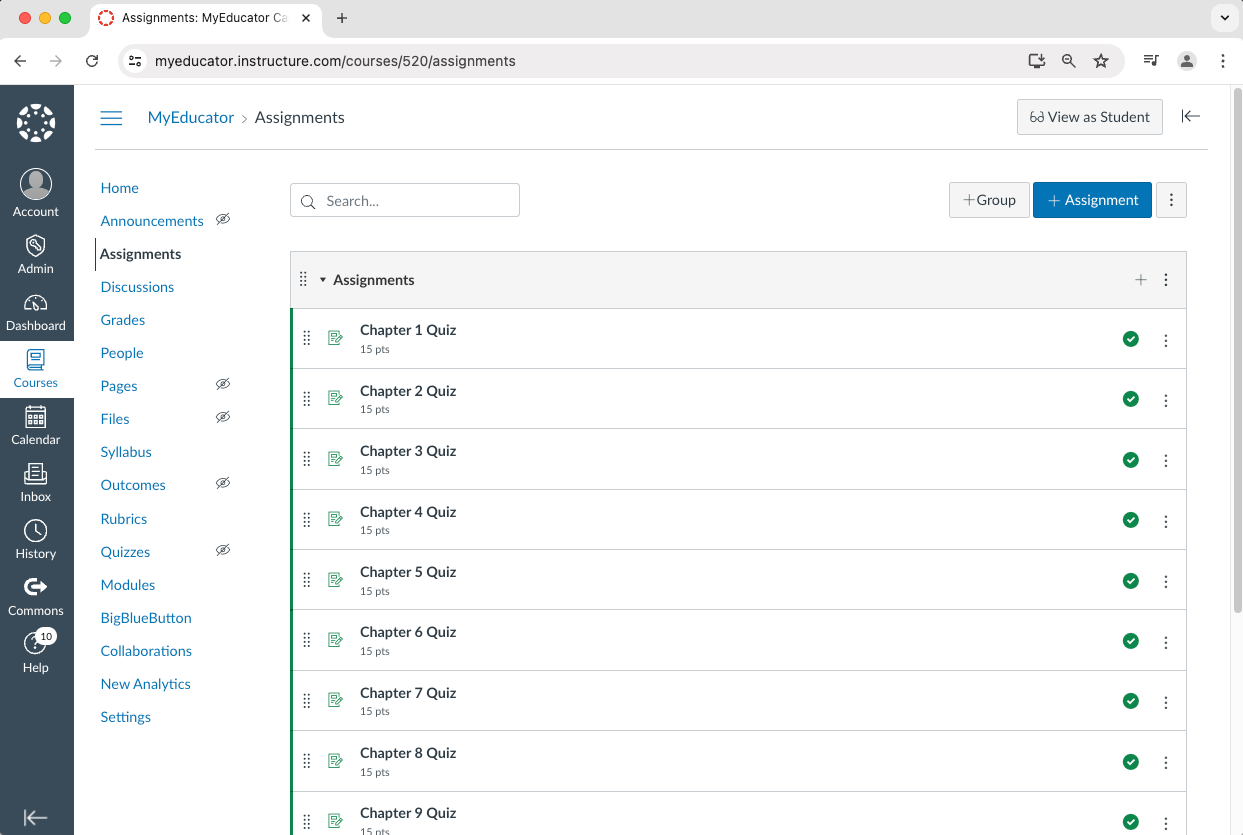
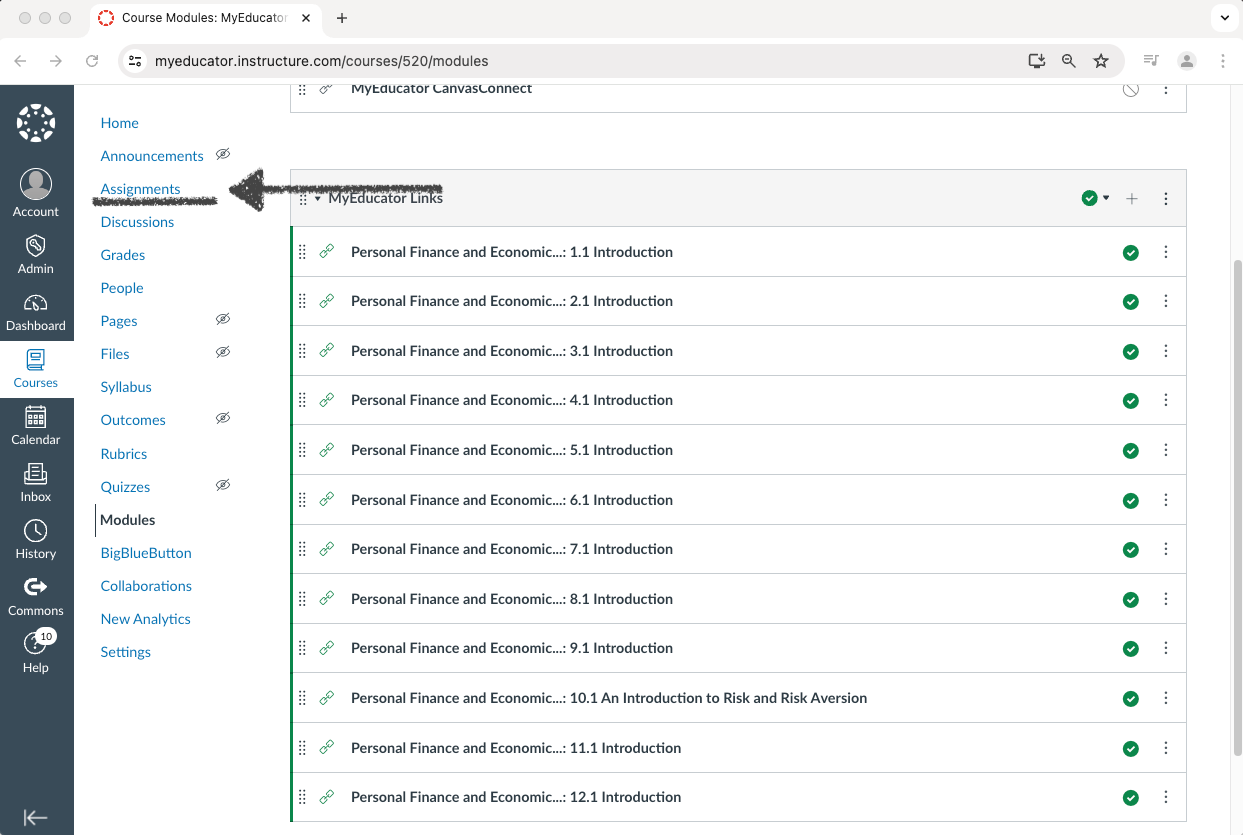
23) Click the ”Assignments” navigation link.
24) Scroll through this page to verify that all of the assessment links have been added as expected.
If all the links have been added as expected, you have successfully completed the setup for integrating MyEducator with your Canvas course via CanvasConnect.